Well, by the time you've read this post, my application will be complete. And here's how to do it:
Before you start: Make sure you are eligible!
If you don't have a degree, or didn't complete middle school and high school in one of the 6 recognised countries (USA, UK, SA, AUSTRALIA, NEW ZEALAND, CANADA) then you're not eligible for EPIK. You might be able to apply for a hagwon, but good luck with that.
1. Find a recruiter
Recruiters make your life a lot easier, if you live somewhere away from where apostilling can be done. That sentence was poorly constructed. Anyway, I live in a tiny university town and have no way of getting to Pretoria to get pretty little stamps and pieces of paper affixed to my documents. Can you tell I'm not really a fan of bureaucracy? Anyway. I'm going through Teach Korea, who cover SA. Make sure your recruiter is one of the 6 officially approved EPIK recruiters; otherwise they might be a scam.
2. Find the forms
You may need to fill out an agency agreement. Those forms should be on your recruiter's website. More importantly, you need to fill out the somewhat lengthy (but thorough) EPIK application form, which can be found on www.epik.go.kr > application. Download the instructions as well; they will help a lot. Teach Korea have made their own instructions specially geared towards South Africans, so that will help too. They also have a handy checklist with formatting guides here.
3. Go to the police station IMMEDIATELY.
Seriously, when you're done reading this post, go to the police station and apply for a Police Clearance Certificate. The process might be different if you're not in South Africa. As for SA, I took my ID and R59 to the police station, asked where to go and followed instructions. It's pretty foolproof. The biggest hassle, I think, was washing the fingerprinting ink off my pretty little digits. And I misheard the policeman when he said 'It should take 28 working days' - I got excited and thought it would take 2-8 days.
They'll give you the form and the receipt. I think they used to use an internal mail system to send this stuff off to Pretoria for more fancy stamps, but now you need to post it off yourself. Apparently if you enclose a self-addressed envelope, it will get back to you faster. Do not use regular mail for this; use Speed Services or a courier so that it gets to Pretoria quickly and you can track it in case it goes 'missing'.
While you wait, scan in the receipt, print it, and email/post it to your recruiter.
4. Have a photoshoot.
Dress up in your shiny new teacher clothes and bribe a professional photographer friend to make you look attractive. Remember to face the camera dead-on. I tried submitting a photo with slightly turned shoulders and was told to change it. Get this photo printed passport size, and get lots of them. You will need them for further documents in Korea. I asked for 6 but he printed 8 (technically 12, but 4 of them were far too close up and would have been rejected - I'm keeping them for future passport renewals, drivers licences, and all other bureaucratic needs).
5. Ask someone to say nice things about you
Find two people who are not related to each other or to you, who have been your bosses, teachers or supervisors. Ask them each to write you a reference letter. Either ask for two copies or ask them to email you a copy, because you need to send a scanned copy to your recruiter for the initial application. You must also post the original copy with your application. I only had one copy of each letter so my recruiter said it was okay if they were not sealed. Did I read them? OF COURSE. And now I can't fit my head through any of my shirts.
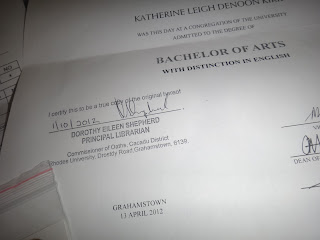
6. Get your degree copied and certified. If you're not going through Teach Korea, get this apostilled too.
This step took me five minutes, and only because I went to the wrong floor. Librarians, school principals and police can do this. I don't know about the apostilling process because Teach Korea are sorting that out for me.
7. Get 2 sealed copies of your academic transcripts thus far.
What it says on the box. This was also pretty simple.
8. Scan in your passport
Use a scanner. Seriously, this stuff is easy now. It's downhill from here.
9. Sending them off
And there we have it - getting all the documents ready. And it doesn't look like that much after all, does it? These will be posted to my recruiter today, via speed services or some kind of courier if I can afford it.
Other things were emailed:
- application form
- photo
- scanned passport
- a letter from my middle school proving I went there, as it was an international school in a non-approved country
- scanned reference letters
- TEFL certificate
I think the most time consuming and difficult part of this whole process were the essay and lesson plans that needed to be completed for the application form, and I'm still not entirely happy about them. But hey. I think my application is pretty strong... So here's hoping.
 |
| holding thumbs |


No comments:
Post a Comment